Late-Model Corvair Three-Point Seatbelts

One of the improvements that can be made to Corvairs is to install three-point seatbelts. These along with headrests or high-backed seats are a great safety improvement.

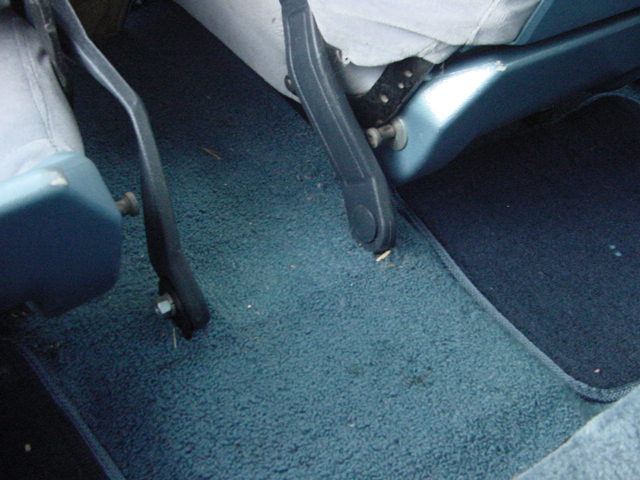
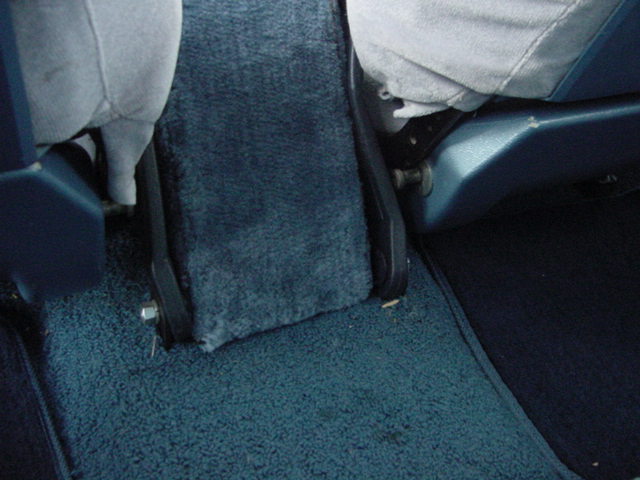
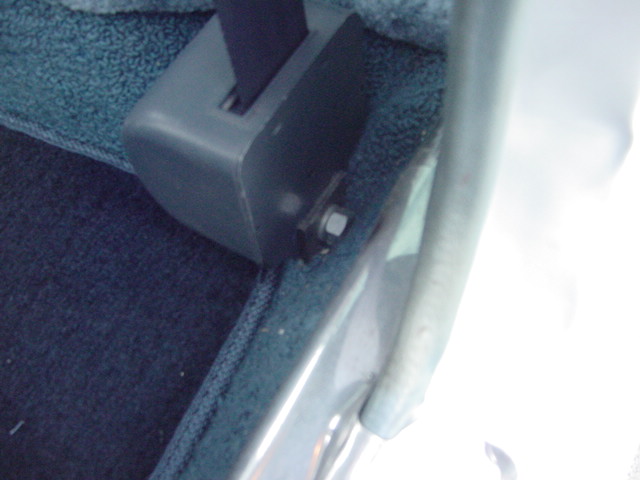
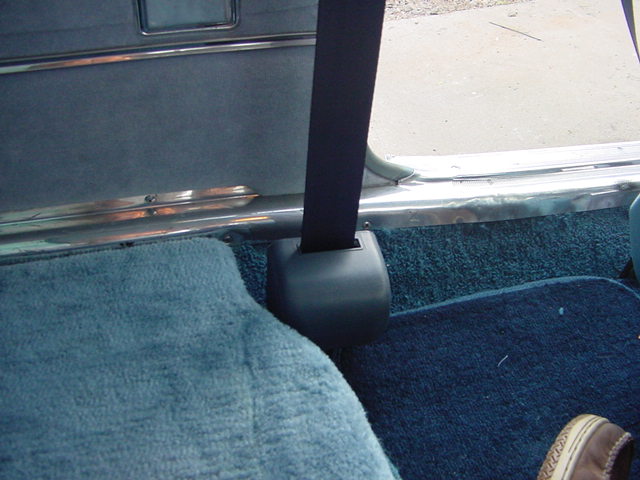
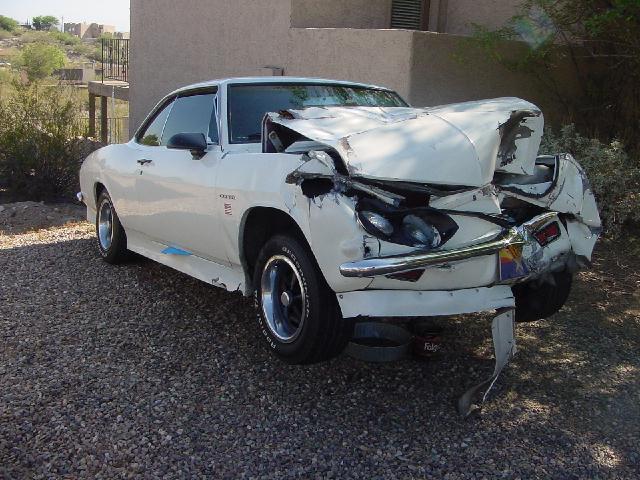
The first set installed was in a '65 Corsa. They were from JC Whitney and were manually adjustable - no inertia reels. Since I was the only one who drove the car, the driver's belt was adjusted once and there they stayed forever. A training session was required every time a new passenger rode with me. My installation was a little questionable but after a 35-mph impact with another vehicle, I am confident that what I did worked well enough to share with others.

My second installation was in a '66 coupe from which a Stinger clone was born. This time I purchased a set of belts with nice self-retracting inertia reels. I used the same installation method and I'm confident that they will do their job. I don't plan on testing them out anytime soon!

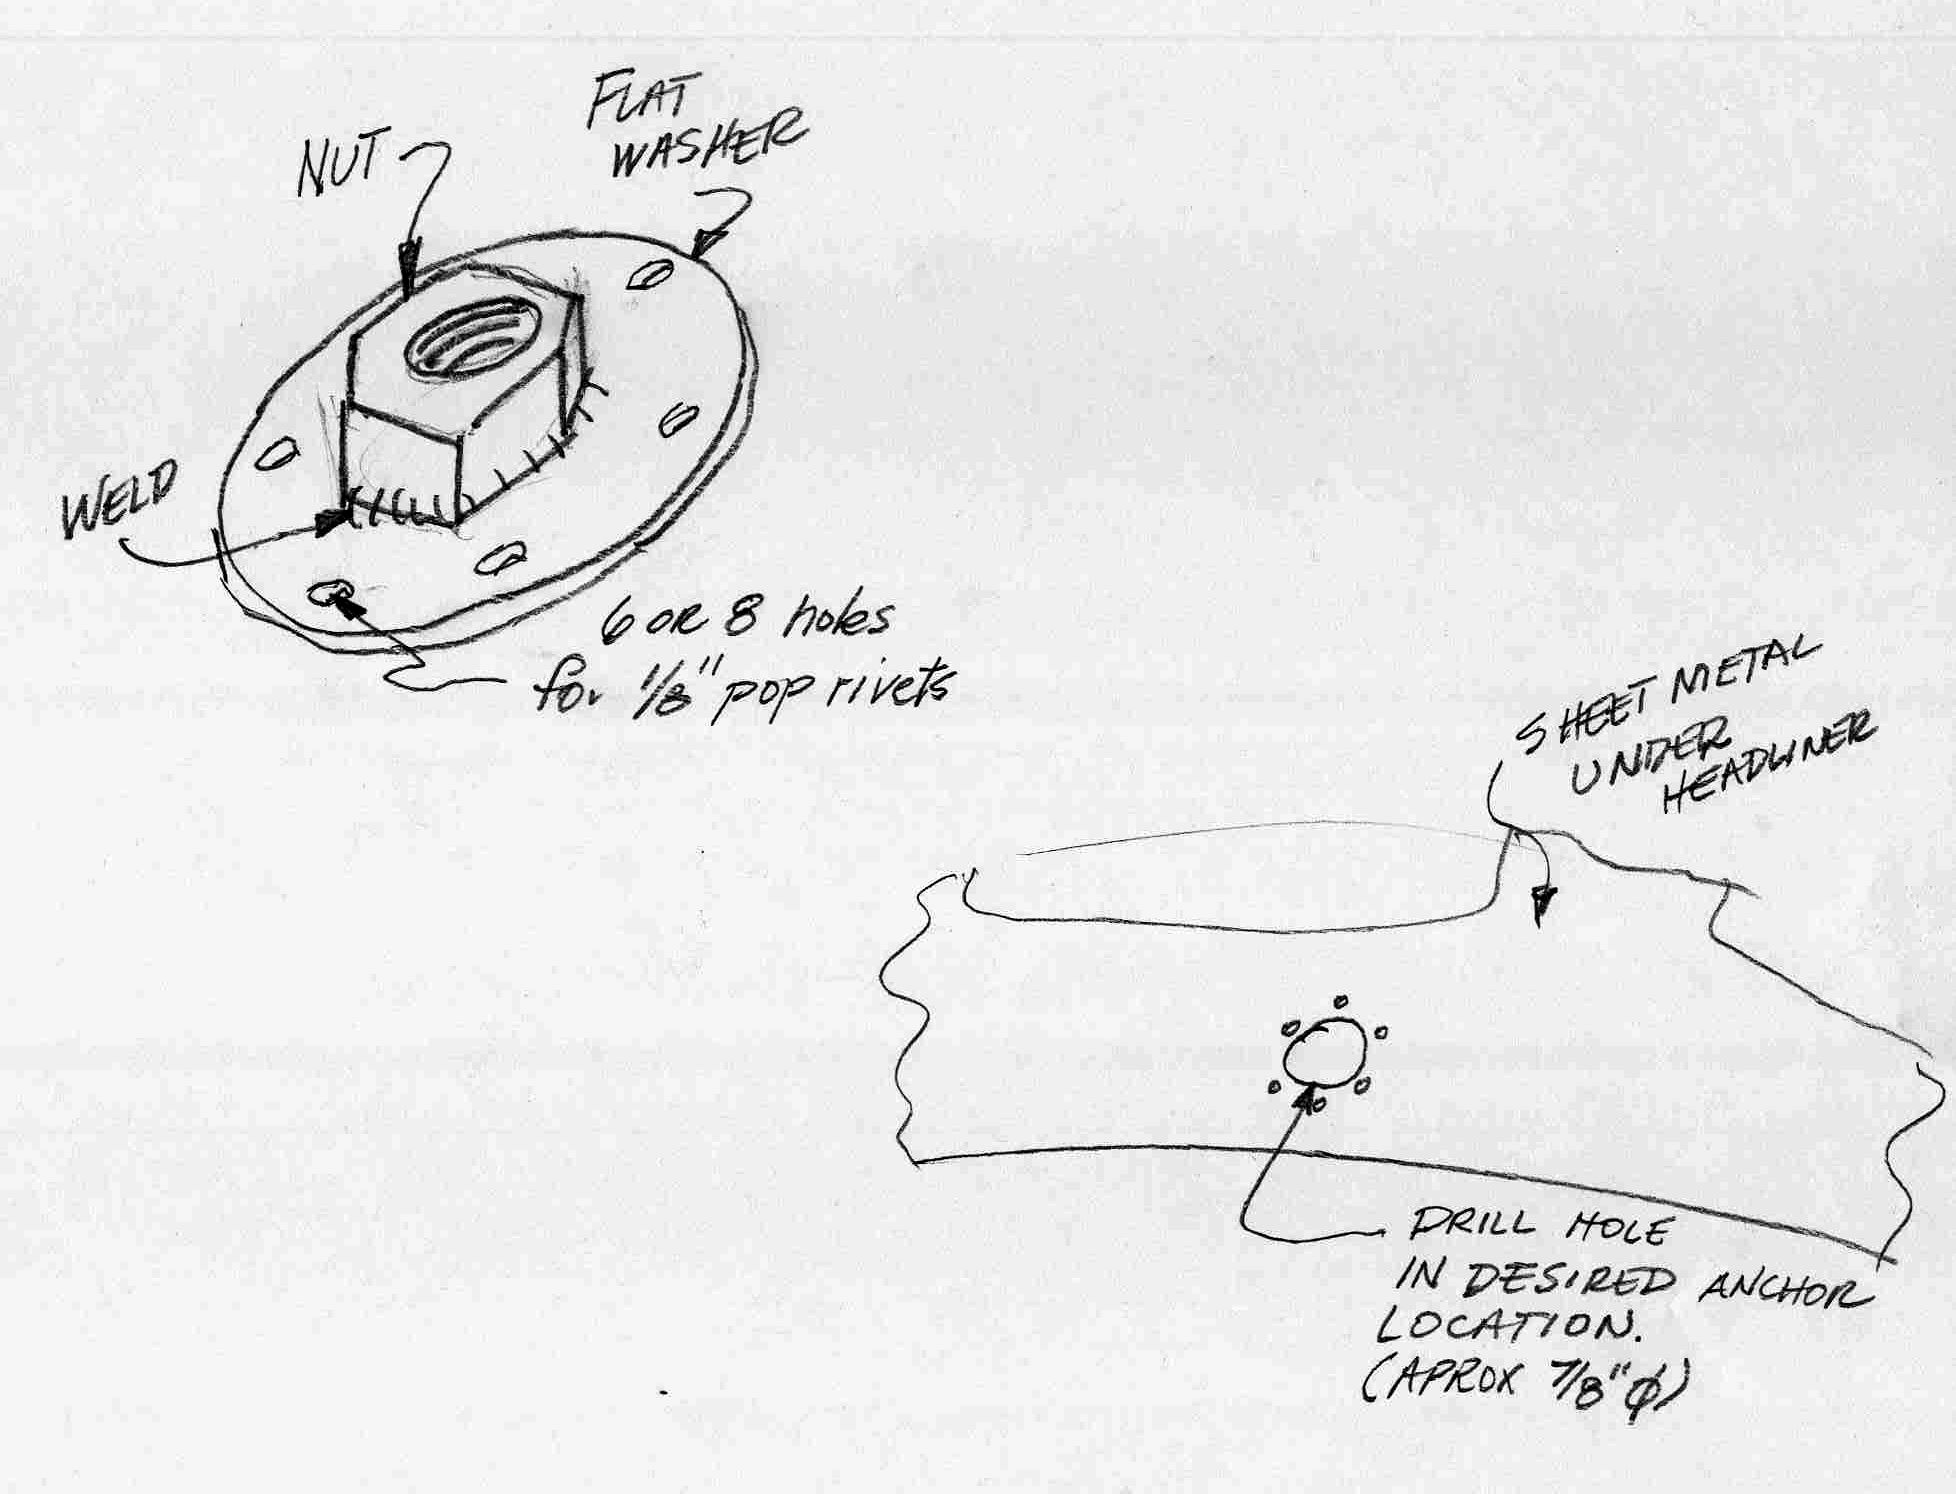
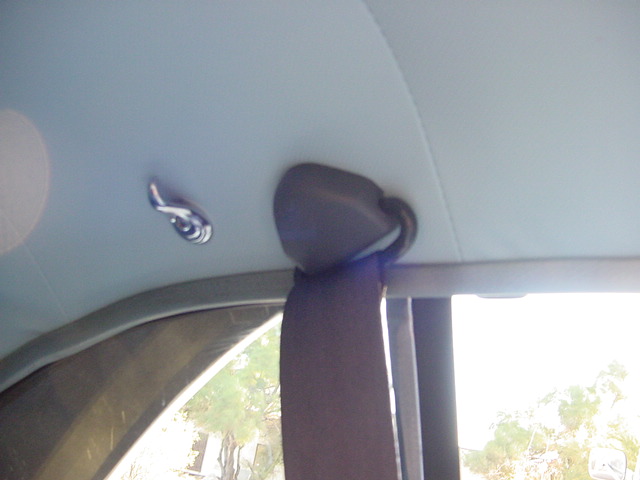
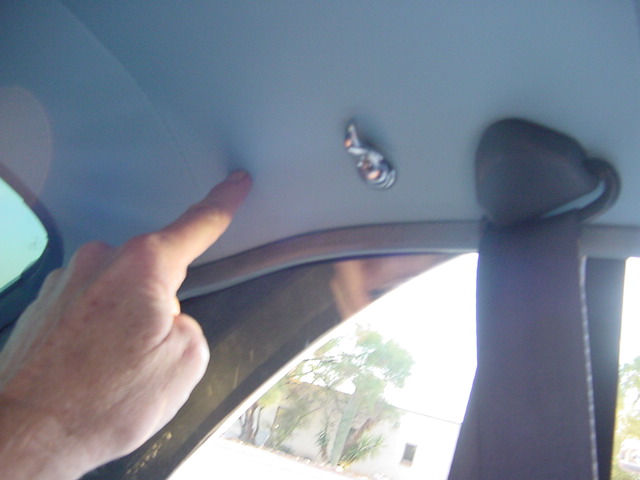
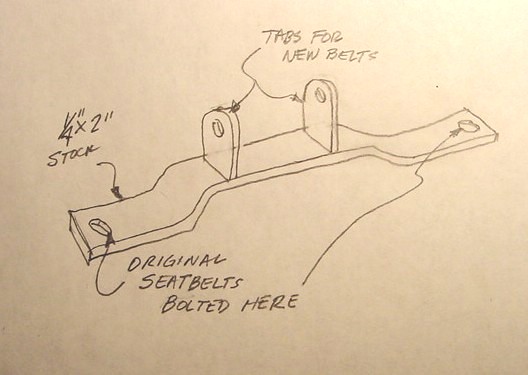
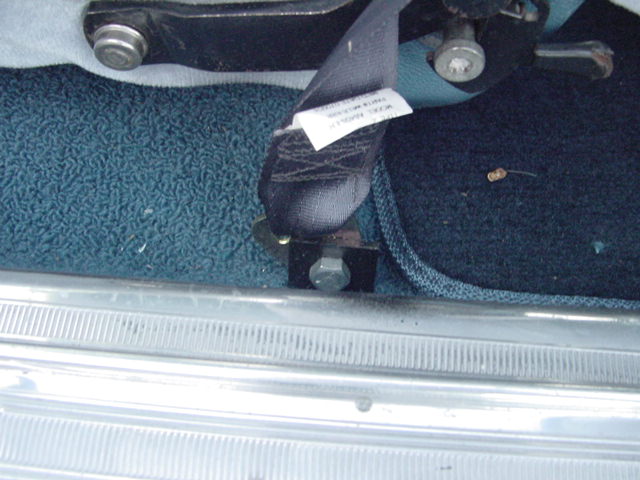
One regret: I wish I had taken some pictures as I was installing them. All I have are finished pictures. I've made a couple of crude sketches to show what I did.

 
The '65 did not have anchor points for the shoulder belts so they had to be added. I fabricated them by welding a nut that would accommodate the anchor bolts provided with the belts (1/2-20, in my case) to a large, thick flat washer. A hole was drilled in the sheetmetal under the headliner large enough for nut clearance (about 7/8" diameter). I drilled 6 or 8 holes around the edge of the washer for 1/8" pop rivets. Placing the washer over the hole in the sheetmetal with the nut first I used the pop rivet holes in the washer as a template to drill holes in the sheetmetal. Then with STEEL (NOT aluminum) pop rivets I secured my anchor point*. 
This is what it looks like installed. I used seatbelt kits from G.E.M. Streetrods. They have a good product and a good price.
The '66 body had anchor points already integrated into the sheetmetal but the location was too far back (see finger) and the wednuts in the sheetmetal was smaller than the anchor bolt that came with the belt. The factory anchor points might be okay if you were using low-backed seats but I don't feel comfortable with the smaller size for the bolts.
The factory inside lap belt anchor points were too far outboard for the this type of belt, so I fabricated a bracket from 1/4" steel strap with tabs for the new belts that bolt to the floor in the factory holes. Here's a sketch that shows what it looked like.
Here's what the bracket looks like installed in the car. It spans the tunnel and the tabs are located so that the belts come up in the right place.
Here's what it all looks like with my home-made console installed.
The floor anchor point for the shoulder belts were pretty straight forward. I used the "L" brackets and heavy flat washers (under the floor sheetmetal) that came with the belts.
Here's another view of how the inertia reel looks. The back seat has been removed and replaced with carpet-covered plywood but in this location the reel would still work just fine with the normal seat installed.
   
The factory outboard lap belt anchor point, again, were just in the wrong location for the these belt, so holes in the floor with the heavy flat washer and "L" brackets were used.
* When I used pop rivets on my first installation I was a little concerned that six or eight rivets would hold in the event of a crash. Upon examining the anchor point after the crash I discovered that not only did they hold but there was no sign of any stress at all to the rivets or the sheetmetal around the anchor. In both of my installations I would have just as soon welded the anchors in place but I was a little concerned about damaging new paint jobs in both cases. If I would have had the presence of mind to install the seatbelt anchors BEFORE I painted I would have welded them in place - probably a little better option.
   
Return to Corvair page